Lesson 47
Here you will learn about descending in open water
By the end of this section, I should be able to answer these questions:
1. What are the five steps for a proper descent with scuba?
2. How do I descend with and without a reference?
3. When do I start equalizing when I descend? How often do I equalize?
4. What happens to my buoyancy as I descend and why?
5. How do I control my buoyancy as I descend?
Descents in Open Water
Five Point Descent

There are five steps you follow when you descend.
- Confirm that your buddies are ready
- Orient yourselves to something at the surface or underwater, such as the boat or a landmark.
- Switch from your snorkel to your regulator.
- Check, and if necessary activate, your dive computer or timer. If in “sleep” mode, most dive computers self activate when you go underwater, but generally it’s best to have them active.
- Signal “descend” and, with your buddies, slowly deflate your BCD.
Descents With and Without a Reference
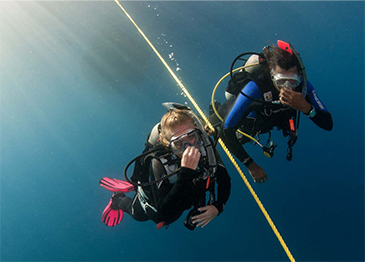
Descend slowly from the beginning. Keep your head above your feet to make equalizing easier and help you stay oriented, and stay close to your buddy.

You often have a line or slope as a descent reference. Usually, you use it as a visual reference only and control your descent rate by controlling your buoyancy. But in some circumstances, you may use the reference to help control your descent or stay in place by holding on to it. The most common example is descending in contact with a mooring line to keep a current from carrying you away from the dive boat.

Sometimes, though, you have to descend without a reference. In this circumstance, stay with your buddy and control your descent by watching the depth on your computer (or a depth gauge) while adjusting your buoyancy.
In Section One, you learned that you equalize early and often as you descend. Begin equalizing immediately, as soon as your head goes underwater. Equalize frequently – every metre/few feet, before you feel discomfort, as you’ve already learned. You will equalize more on an open water dive than in confined water because you’ll be going deeper.
Recall that in most circumstances, as you descend your buoyancy decreases, which makes you go down faster unless you adjust for it. This results from the pressure compressing your exposure suit (if you’re wearing one), making it less buoyant. You adjust for this buoyancy loss by adding air to your BCD (or dry suit if you’re wearing one).
When inflating your BCD to adjust your buoyancy as you descend, do so in small amounts, frequently. This keeps your buoyancy under control and allows you to descend slowly. This helps you equalize every metre/few feet. Ideally, you will arrive at the bottom with your buoyancy adjusted so that you’re neutrally buoyant.
Quick quiz
Module Two

I'll take you diving!
Copyright © Larry Wedgewood Scuba Instruction All Rights Reserved

