Lesson 48
What goes down must come up. Here will learn about ascending in open water
By the end of this section, I should be able to answer these questions:.
1. What are the five steps for a proper ascent with scuba?
2. How do I start my ascent?
3. What is the proper rate to ascend while scuba diving?
4. What happens to my buoyancy as I ascend? Why?
5. How do I control my buoyancy while ascending?
6. How do I ascend with and without a reference in open water?
7. What is a safety stop? How do I make one? When would I not make one?
8. What do I do during the final stages of my ascent?
Ascents in Open Water
Five Point Ascent
Just as there are five points when you descend, you and your buddies follow five steps when you ascend.

- Signal “up” and confirm that your buddies are ready.
- Check your dive computer to be sure you’re within its limits. (You’ll learn more about these limits later. If you’re not using a computer, check the time for use with dive tables.)
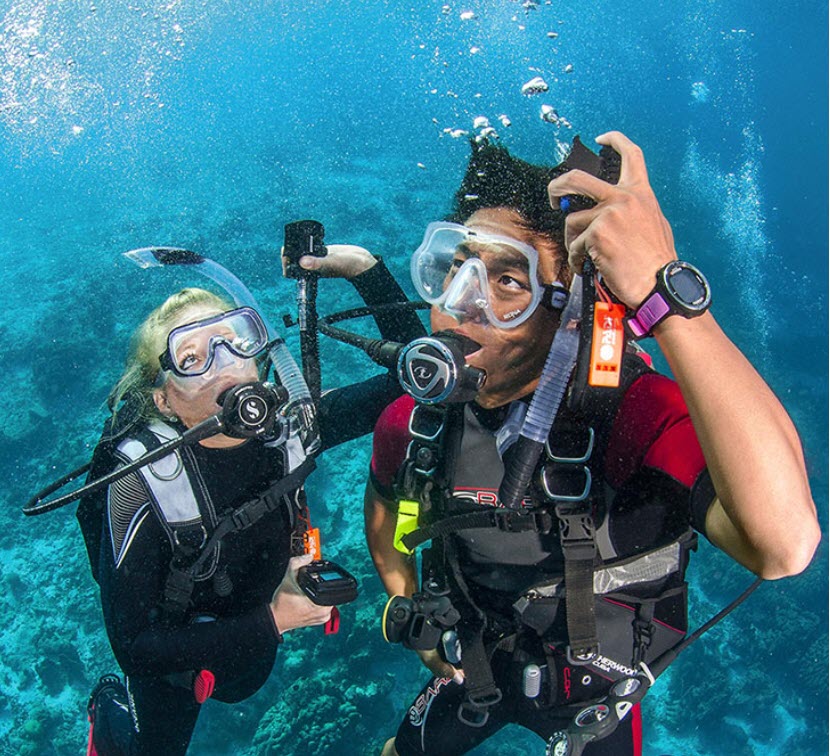
3. Look up and hold up your BCD deflator hose. Do not add air to your BCD. If you’re properly weighted and neutrally buoyant, you only need to start swimming up gently.
4. Ascend slowly – no faster than your dive computer’s maximum rate. The maximum ascent rate is 18 metres/60 feet per minute, but most dive computers require a slower rate of 10 metres/30 feet per minute. Most dive computers will warn you if you ascend too fast, so use your computer to guide your speed. Release air expanding in your BCD to control your buoyancy so you don’t start to rise too fast. If you’re not using a computer, use your timer and depth gauge to be sure you ascend no faster than 3 metres/10 feet each 10 seconds.

5. Look up and turn as you ascend, and stay with your buddies. Watch for obstacles overhead. Reach up as you near and break through the surface.
Controlling Your Buoyancy
As you ascend, a wet suit, or the air you added to a dry suit, and your BCD will expand. Both of these changes cause your buoyancy to increase; the shallower you get, the more buoyant you become if you don’t adjust for it.
To control your ascent rate, release air from your BCD (or dry suit) as you ascend. Adjust your buoyancy in small amounts, often, just as you do while descending.
You should ascend slowly and be able to pause your ascent easily. If you start to rise too fast or cannot easily pause your ascent, you’re not adjusting frequently enough.
Ascents With and Without a Reference
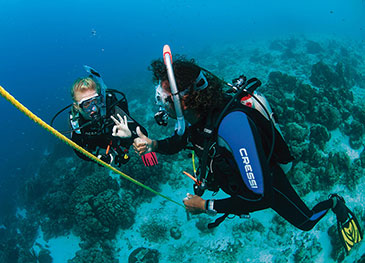
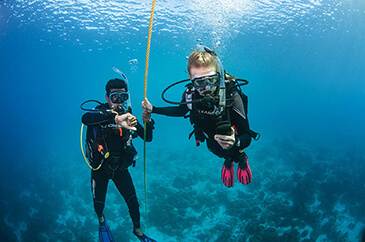
When possible, ascend with your buddy following a reference such as a sloping bottom, mooring line or a vertical line deployed from a boat or float, much as you would use a reference when descending. A visual reference helps you control your ascent rate and maintain orientation.
Fixed references, like mooring lines, can help you slow or control your ascent rate, but this should not be necessary if you control your buoyancy properly. In some situations, however, you may ascend holding a reference line so you don’t get carried away from the boat or exit point by a current.
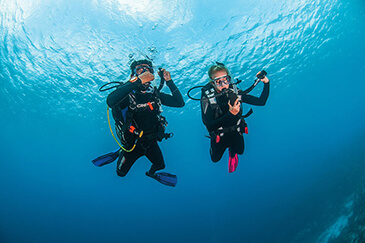
You may also ascend in midwater without a reference. This may be intended (as will be the case for many dive sites), or may be the result of having to ascend to the surface before you planned to, away from where you’d expected to ascend. This could happen if you lose your direction, if there’s an emergency or problem.

When ascending without a reference, stay with your buddy. Watch your depth and ascent rate on your dive computer, and control your buoyancy. If you’re not using a dive computer, many modern depth gauges help guide your ascent rate. Otherwise, watch your depth and time. Ascend no faster than 3 metres/10 feet in 10 seconds, though slower is fine.
Sometimes you need to navigate while ascending without a reference. For example, you may run low on air before reaching your planned exit point and have to start up, but want to continue swimming in the right direction. One common technique is for one buddy to navigate while the other controls the ascent. You stay together during the ascent (holding on to each other can help). You’ll learn basic navigation in Sections Four and Five.
Safety Stops
As a prudent, conservative diver, make a safety stop a normal part of your ascent procedure. A safety stop is simply a pause in your ascent between 6 metres/20 feet and 3 metres/10 feet (commonly 5 metres/15 feet) for three to five minutes.

A safety stop helps slow your overall ascent, then gives your body tissues extra time to release dissolved gases. Among other benefits, this helps reduce the risk of lung overexpansion injuries and decompression sickness (DCS – you will learn more about DCS in Sections Four and Five)..
To make the stop, you and your buddy(ies) slow your ascent as you pass 6 metres/20 feet and fine-tune for neutral buoyancy. Pause at about 5 metres/15 feet for three minutes or longer – variations of a metre/three feet above or below are not a problem. During the stop, check your computer to be sure you didn’t accidentally overstay its limits.
It is easiest to make a safety stop with a reference. In many environments, you can plan the dive to follow a slope upward, so that you are still near the bottom or reef while stopped at 5 metres/15 feet. This allows you to keep exploring, watching nature, taking pictures, etc., while making the stop. But, when necessary, you can make a midwater safety stop without a reference by watching your depth gauge and hovering neutrally buoyant.
Safety stops add conservatism, but you don’t make them during emergencies such as if you were assisting a diver who has an air supply problem, if you were very low on air, etc. If the maximum dive depth is very shallow – say, to 6 metres/20 feet or less – you wouldn’t usually make a safety stop because you’re diving in the safety stop depth range anyway

Reaching the Surface
After completing your safety stop, signal your buddies to confirm they’re also ready to ascend. If you’re neutrally buoyant, you only need to swim gently upward to start ascending again.
As you ascend the final distance, look up and reach up with your BCD deflator in your left hand. You will need to vent expanding air from your BCD to control your buoyancy. Rotate if necessary to check for obstructions overhead.
Keep your hand up as you break the surface. Continue to breathe from your regulator as you inflate your BCD. After making sure you’re floating comfortably, switch to your snorkel. When diving from a boat, signal the divemaster that you’re okay, and swim toward it if you didn’t ascend near it (or do as the crew directs – sometimes the boat will come to you).
Quick quiz
Module Two

I'll take you diving!
Copyright © Larry Wedgewood Scuba Instruction All Rights Reserved

